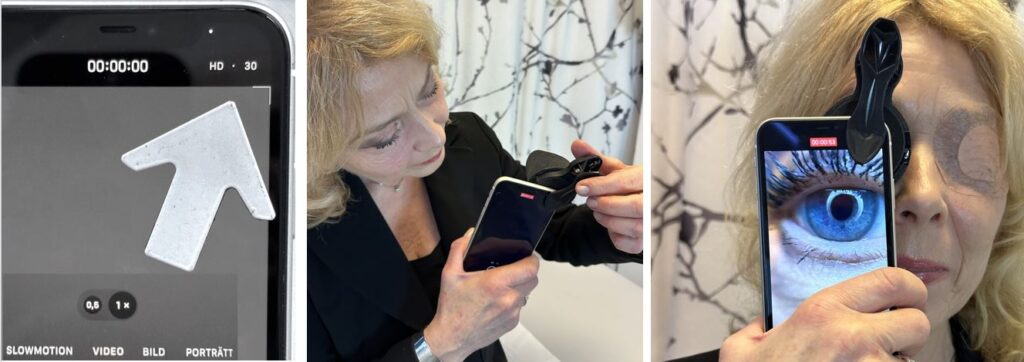
Preparation
1. Find a suitable place for the examination, for example a bed or a soft carpet
2. Prepare a way to play the audio instructions
3. Familiarise yourself with the examinations Look here
4. To enable a broadcastable video: start the camera on your mobile phone. Select “video”. Check that the video recording quality is “HD 30” or set at the lowest level
Important
To provide clear diagnostic eye movements, it is very important that you cannot control or focus your gaze. During the examination, you should therefore close your left eye (the eye that is not being filmed) or cover it with the patch.
When you experience dizziness, carry out an examination
1. Sit at the examination place
2. Turn on the Nystagmocatcher light ring with the slide switch
3. Clamp the Nystagmocatcher over the mobile phone camera lens so that the two lenses are on top of each other. If your phone has multiple lenses, choose the dominant lens
4. Mount the foam eye shield on to the black ring. The wider part should face to the right
5. Play the exam instructions from the list below using an audio source other than your mobile phone. The instruction sound should als be audible on your video recording
Use a computer, tablet or another mobile phone.
Audio instructions
6. Start the video program on your mobile phone at “now”
7. Press the Nystagmocatcher against the right eye so that no light can leak in. Close your left eye or cover it with the patch
After the examination
1. When you have finished the video recording, it is saved in the mobile phone
2. Don’t forget to switch off the light ring’s illumination
Evaluation of video-recorded eye movements
Option 1. Evaluate the eye movements of the video recording yourself
Option 2. Bring your mobile phone, show the video clip to a doctor who can evaluate the eye movements
Option 3. Send the video clip online to a doctor who can evaluate the eye movemnets. If resident in Sweden, you can choose to upload the video clip to Yrselcenter’s dizziness clinic using our GDPR compliant cloud service